Looking to create a wildlife website using WordPress then this is the right post for you. I love wildlife safaris where you can see wild animals which you usually see in the forest. You can see these animals in sanctuaries and national parks.
In this article, I will show you how you can create a wildlife website using WordPress. Often if you have visited zoos, national parks, and sanctuaries you might have found some information about them on a website. Information like location, travel packages, top spots, galleries, and every piece of information related to wildlife.
Believe me, creating a wildlife website is super easy using WordPress. As you know, WordPress is one of the popular CMS platforms which you can use to create any type of blog or website. Instead of hiring a developer and creating a wildlife website from scratch you can use WordPress and install a theme and that’s it your wildlife website is ready.
So, without ado, we can see how we can create a wildlife website using WordPress.
Who can create a wildlife website?
Before we start creating a wildlife website, I will mention who can use or create a wildlife website. As I have mentioned earlier, you can see sites related to national parks, sanctuaries, or personal website.
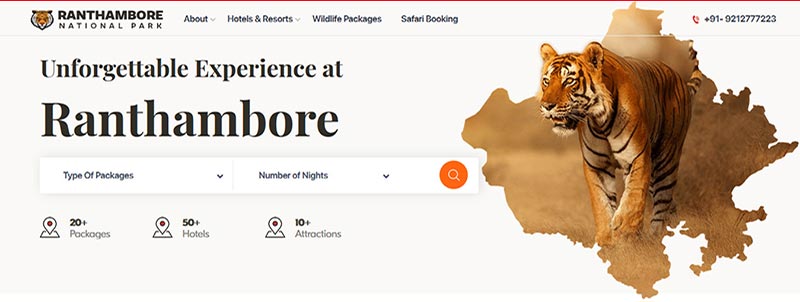
Check out the below example; it is one of the top national parks in India.
Guess what?
The site gets created using the WordPress platform. If you are the owner of a zoo, you can also create a wildlife website. Moreover, if you are a wildlife photographer, you can create your wildlife photography website.
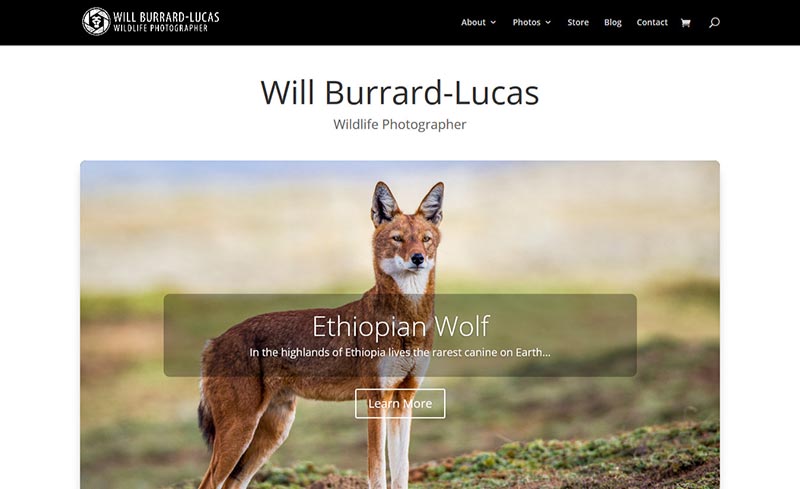
You can check on the below example as one of the best wildlife photography website using WordPress. You see, many famous brands, businesses, and photographers use WordPress to create any type of website.
Creating a wildlife website is easy if you are choosing the right platform. Furthermore, to host the website you should make sure which hosting is perfect for your website.
Getting a domain name and hosting
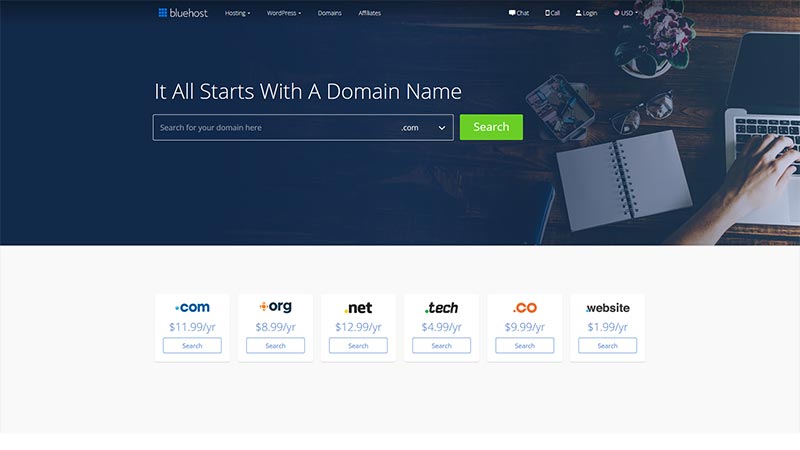
If you are looking to create a wildlife website or a portfolio website then you should have a proper hosting partner. Getting a domain name is easy as there many domain service providers in which you can get a domain name for hosting a website. But you might be thinking about what domain name you should need to create a wildlife photography website.
Sometimes domain names give you the identity of your website. You might have noticed the domain name Ranthambore National Park in the above example. You see the National park in the domain name shows that the website is related to the national park.
Similarly, for a personal site, you should choose a proper domain name to create a wildlife photography website. You need to make sure that the domain name that you have purchased should not be misleading and confusing.
When purchasing a domain name you should choose the name in such a way that it gets remembered and your visitor can type in the URL.
Where do I get the domain name?
As I said there are many domain service providers where you can register and buy your domain name. Some of the top domain name service providers are Bluehost, GoDaddy, Hostgator, and many more.
There are many domain extensions that you can choose for your domain name. Some of them include .com, .org, .net,.info, and so on.
You can choose any of the extensions that you like according to your site that you have created. Moreover, some of the best hosting service providers like Bluehost or Hostgator will give you a domain name for free.
If you buy their hosting you can get the domain name for free. Since they provide both the domain name and hosting service you don’t have to go anywhere else to get the domain name of your choice.
Choose the right web hosting
Once you have registered your domain name you need to choose the right hosting service for your wildlife website. The web hosting service is where you can host your website to connect users and the website through the World Wide Web.
It is important to note what type of hosting service suits your needs to create a wildlife website. There are many hosting service providers that you can choose from but I recommend Bluehost. It is one of the best web hosting services and you can get it for a very affordable price.
Bluehost has small scale plans to huge business plans which you can choose to host a website. You don’t need to buy or spend a huge amount of services that you don’t need or plan for hosting. When purchasing a hosting service you need to make sure that you look for better service. You should look for a simple, secure, support, and low-cost hosting service.
Bluehost provides all these features and awesome services that I need. Moreover, you can choose any type of services that you need like Shared Hosting, Cloud Hosting, VPS, and Dedicated hosting service.

Bluehost is affordable, secure, and provides support 24/7. It gives you assurance and guidance that your website is safe.
It will also guarantee that your website gives you the best performance on any search engine. Since you have given so much dedicated time and energy on creating your dream website you should feel that your website gets secured. You would be needing assurance that your website could not get into the wrong hands or gets hacked by intruders.
Choosing the right plan & service
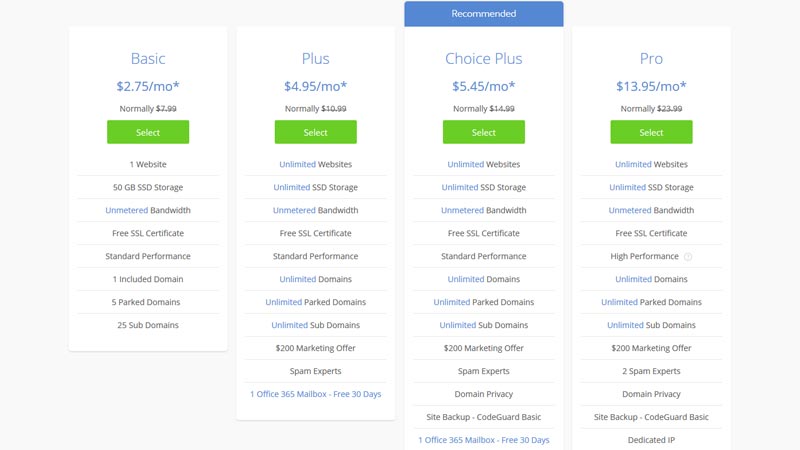
Bluehost has many hosting services and plans to choose from. You can choose the Shared Hosting service if you are looking to create a website for your locality.
If you are targeting the global market which you should be looking for then I recommend you choose VPS or Dedicated hosting service. You don’t need to buy or spend a huge amount of services that you don’t need or plan for hosting your website.
Once you have selected and chosen the right plan for hosting a website you need to purchase that plan. Each hosting service has different plans whether you are purchasing a Basic Plan or a Pro Plan.
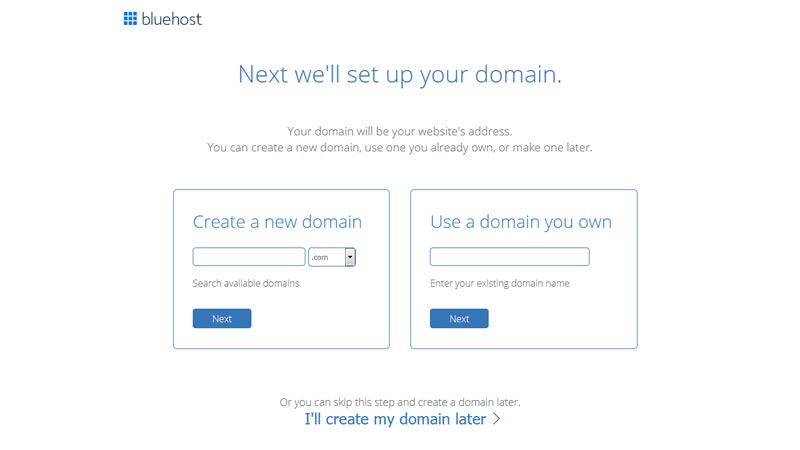
You will be redirected to the domain name page where you can purchase the domain name to purchase or buy it later at your convenience.
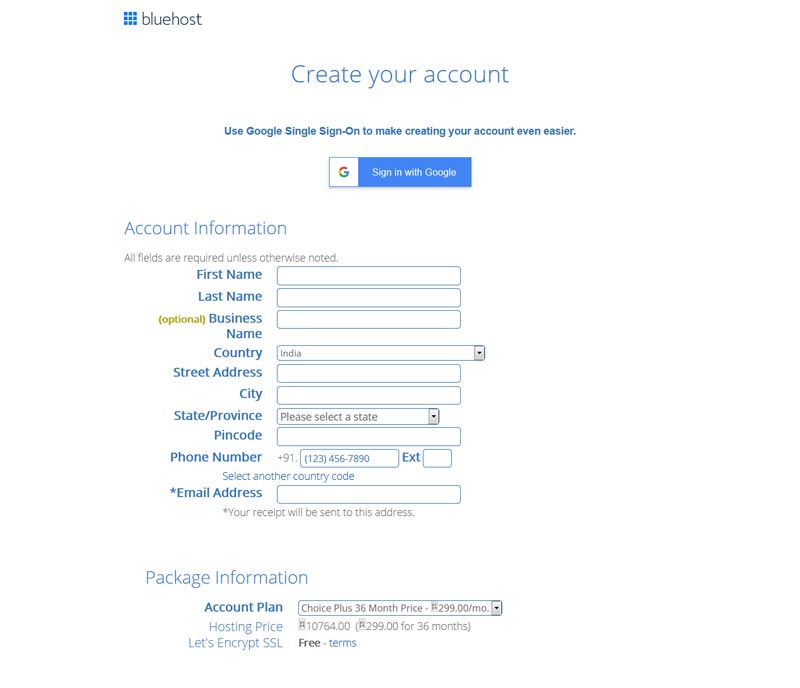
After that, you need to fill in your account information where you need to add your name, email address, country, and choose the plan. Since you have selected the relevant hosting service so that the service plan will get displayed. You can choose the plan for 12,24 or 36 months.
Additionally, you can add extra packages by selecting Bluehost Sitelock Security, Codeguard tools, and SEO tools. These are extra packages if you need to secure your website from hackers and spam attacks from intruders.
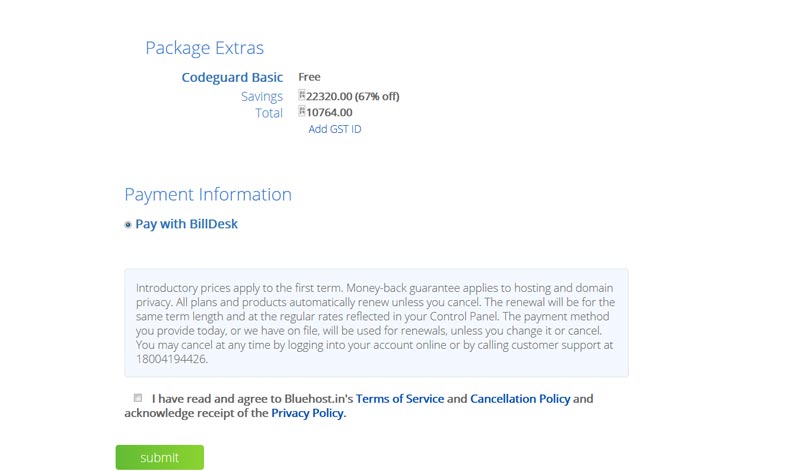
Finally, you need to add the Payment information of your credit card and tick on the terms and conditions options (though you are not going to read it).
Click on Submit option and your hosting service is confirmed with Bluehost. You will get a confirmation mail about the plan and payment details of your purchased hosting.
Choosing the right platform to create a website.
Although, you have bought the domain name and hosting for your site. You would still be looking at how to create a wildlife website.
As said earlier, you can create a website following 2 methods. Either you can hire a developer or create a website all by yourself. Instead of spending thousands of dollars in hiring a developer, I recommend you can choose the best CMS platform.
But wait, which is the best CMS platform to start a wildlife website?
There are many like WordPress, Joomla, Wix, Drupal, and Squarespace. One of the best CMS platforms that you can choose is WordPress.
Remember the Ranthambore National Park website it’s been designed and developed using WordPress. It is far better one of the best CMS platforms as compared to its competitors like Joomla and Drupal.
Is WordPress easy to use?
I have been recommending you with WordPress because this is how I created my first website and it was very easy to use.
Moreover, it is FREE, YES you heard it right it is free and is an open-source platform even for beginners for creating a website.
According to w3techs.com, 38% of the websites get created using WordPress. You see more than 990+ websites created every month using WordPress. Moreover, it is one of the fastest CMS where more than 70 million new posts get created every month using WordPress.
If you are new to WordPress then you can refer to WordPress for Beginners. I have mentioned the basics of how you can install and use WordPress for your site.
The main reason that I recommend using WordPress is it is easy to use and one of the best CMS platforms. Once you master WordPress you can create any type of website.
Choosing the right theme for your wildlife Website
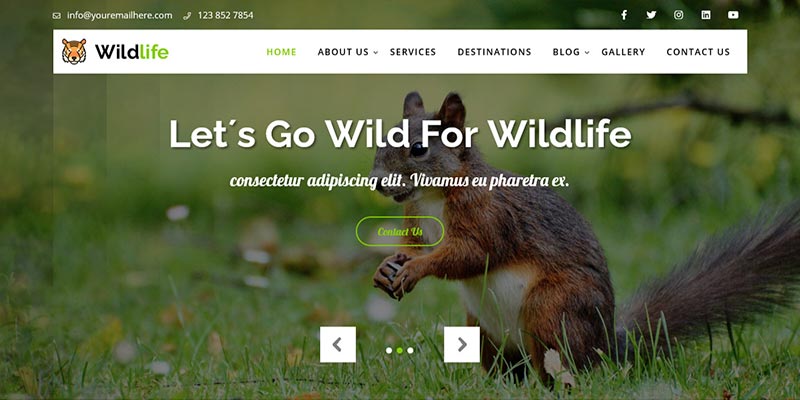
Finally, you have your own domain name and hosting for your website. Now, it’s time to choose the right theme to create a wildlife website. But first, you need to do some search by looking at some of the same niche sites or checking on other wildlife websites. You need to see what type of theme they have used and what type of features are needed to create a wildlife website.
With WordPress, you will have thousands of Free & Paid themes. There are thousands of free WordPress themes that you can found on the WordPress repository. But choosing a free theme would only give you limited features and functionalities. So, you should choose a premium or paid WordPress theme where you can extend the functionalities and with more features.
There are many WordPress theme provider which you can choose to create a perfect wildlife website. You can find a theme that is flexible and adapt to changes according to your needs. With a perfect WordPress theme, you can find many theme options and customization features that you can put in place on your site.
Free vs Paid Theme
Mostly, people would prefer going for Free WordPress themes as compared to paid ones. Moreover, you might be thinking I’m out of my budget and cannot take more on investing in purchasing a premium theme.
But I would like to mention here that there are many WordPress theme providers who provide premium themes at a very affordable cost. While some of the Free themes have their own limitations as compared to a paid theme. Once you have purchased the hosting and domain name you would find an option on how you can install the theme on your WordPress site.
Customizing your wildlife website
When you buy a theme you will install it with the demo content data like sample posts, default logo, footer credits, and many other things. You need to adjust according to your needs by changing all the default settings and options.
Many theme providers provide settings or options to change this in the customizer settings. You can change these settings on the backend of your site Appearance >> Customize section. You can change the Site Title and Tagline as per your needs.
Furthermore, you can change the theme color, typography, and many other things from theme customizer settings. You can add categories and use widgets as per your needs and create a fully responsive wildlife website.
Bonus Tips
Add images and videos
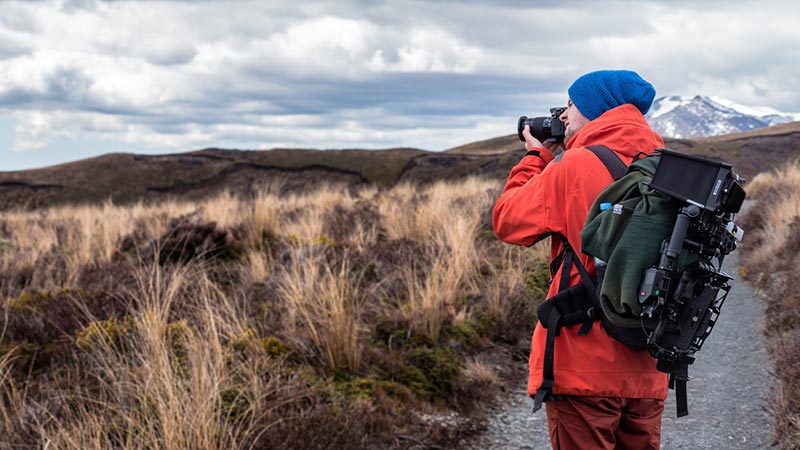
It is said that a picture says a thousand words. Well, that’s true having high-quality images will attract your users to stay longer on your website. Apart from that adding videos and graphics would be a bonus. So, where you can find high-quality images? or how you can add images on your wildlife website?
Here are some of the options that you can try on your website.
If you are a wildlife photographer then it is much easier for you to take photographs of wildlife. There are many professional photographers who have a portfolio website.
You can see an example of Will Burrard-Lucas’s website. You can notice that such an amazing website created using the Divi WordPress theme by Elegant Themes.

This is such a great example of a wildlife photography website where you can enjoy your passion and gain recognition.
Apart from that, you can also generate an income from your personal website.
Promote your wildlife website

Usually, the owner of the national parks or sanctuaries would be supported by the government. But if you are an individual and bought a zoo to attract tourists you can promote through various modes of channels.
For government-recognized national parks, it wouldn’t hard for marketing as they will announce and promote in every possible way. One of the easiest ways is the State Government itself announces through TV channels and other sources of media. The other thing is that they can do is pay-TV actors and ask them to promote on their behalf.
For an individual, wildlife photographer, Zoo owners, or any private property landowners they can promote the website in possible ways. Being a wildlife photographer, or private property owner who is low in the budget can market their website through social media and mouth-to-mouth marketing.
For small-town landowners, they can display banners on every corner of the town and encourage people to visit their place. You can also go for public speaking, visit any charity functions, through in pamphlets, or have your website or Zoo name on your employee’s t-shirts.
Making money from your wildlife website
Once you have promoted your website and people will start visiting your wildlife national parks and that’s when you earn income. You can sell tickets, travel packages, sell eCommerce products, prints, and many more. If you are an individual private owner of a zoo you can sell tickets, shops, stay-ins, and give tours of your wildlife safari.
Check out this amazing website of Benjamin Mee – Dartmoor Zoological Park. A private owner, he organizes events, weddings, parties, and everything to promote his business and raise money.
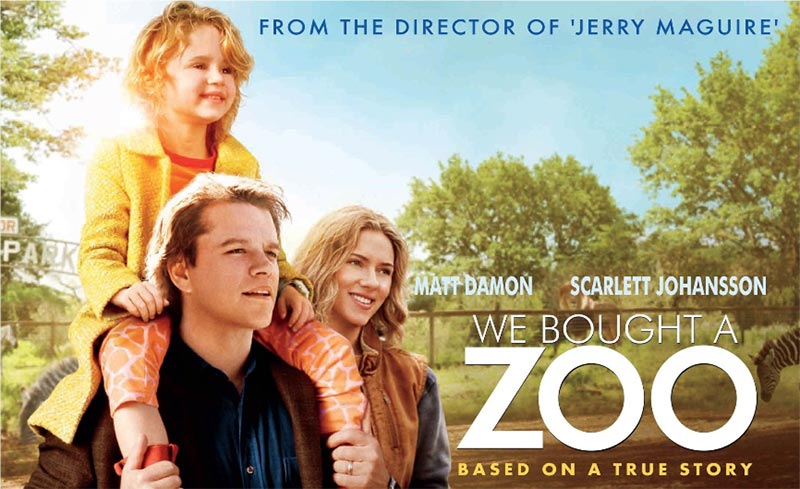
Benjamin Mee, I hope you can recall the name and if not then you might need to watch the movie – “We Bought a Zoo“. Starring Matt Demon, buys a property that comes with the Zoo. He eventually decides to buy the property and the Zoo and with the help of his family and co-workers decides to open the Zoo for the public.
This is a real-life story experienced by benjamin and in the movie, Matt Demon is playing the character of Benjamin Mee.
On the side note, I loved the movie and I guess there are many Zoo owners around the world who has their own private property where they decide to create a national park or Zoo.
For a wildlife photographer, you can sell prints, books, products like caps, t-shirts, and many more. Just take an example of Will Burrard-Lucas’s website.
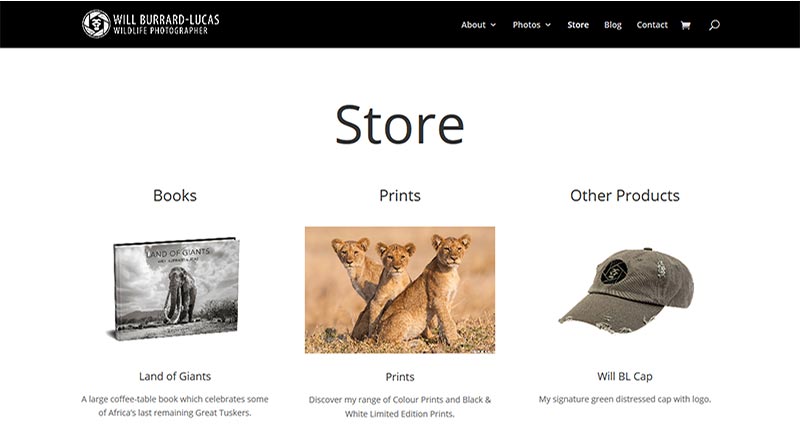
You can see he’s alone and travel through wildlife. Through his website and recognition, he can travel and explore amazing places take wildlife photographs, and sell them.
Conclusion
So, here is how you can create a wildlife website in 30,45,60 minutes. I don’t know the exact number but if you are a beginner in WordPress then it won’t take you more than 60 minutes to create your own wildlife website.
If you are a developer then I would not say it would take 10 minutes but they always think of adding new features and functionalities and customize the theme and take its limits to its core.
I would love to hear from you:
Have you created your wildlife website?
Which theme you have used and why?
You can comment below and I hope you liked this post and please show some love by sharing this on Facebook and Twitter.
