
Everyone is thinking to create an online website. Are you the one among them? This is a guide for WordPress Beginners where you can learn and create your own website using WordPress.
You might get confused about which platform to choose for creating a website. It’s a tough choice right, as there are many blogging platforms that you can choose from.
You can go for WordPress, Joomla, Blogger, Wix, and so on. Using WordPress to create a website is easy. If you wish to learn WordPress then you can read this post about the basics of WordPress.
In this WordPress for Beginners guide, you can learn how to create a website and learn the basics of WordPress.
So, let’s start with our journey as a beginner’s guide on using a WordPress platform.
What is WordPress?

As the title suggests WordPress for Beginners guide, thus we would be covering all the basics. If you already know about it you can skip this part and move on to the next topic.
WordPress is one of the Popular CMS or (Content Management systems). Around 33% of online businesses and bloggers use WordPress. Due to its flexibility, ready to change and adapt according to user needs you can use WordPress.
But, WHAT IS CMS?
CMS or (Content Management System) helps you update, edit, or create your own content. It can make your site adapt according to the changes that you need for your requirements. The CMS features are wide, as it helps with SEO, upgrades themes & wizards, user & group functionality, and many more.
One of the popular CMS that we are discussing here is WordPress which can use and integrate. WordPress comes in more than 50+ languages.
It has over 72+ million users and active installations worldwide. It will be increasing day by day. Any CMS is easy to use if you understand the basic features and uses. Yet, it is up to you which interface you should choose for developing a useful and informative website.
Is WordPress FREE and Easy to Use?
You don’t need to spend a thousand dollars on learning WordPress. There are many learning tutorials, developers, and courses on WordPress, so I would say not to worry about that.
WordPress is FREE. Yes, you heard it right it is open-source application software. You can download WordPress from wordpress.org’s official site.
About the usage, you will get surprised that the number of people using this platform. Due to its flexibility and usage to adjust as per user requirements.
There are about 1000s of websites that get designed every year. As per its competitors, like Joomla and Drupal it is easy to use and has a better content management system. One of the leading hosting service providers Bluehost recommends WordPress for creating a website or blog.
As said by Bluehost, “WordPress is one of the leading website CMS platforms that they have hosted as compared to other CMS platforms like Joomla and Drupal.”
Why Choose WordPress?
Here are some of the top reasons that you should check out.
FREE: As I have already mentioned you can download WordPress from their official website as it is free. You don’t have to spend a huge amount on developing your website from developers. WordPress is FREE and open source so you can design your own website in minutes.
Flexible: A feature that you would like is its flexibility. If you need to design your own website then you have the flexibility and make changes using WordPress. If you want to create an e-commerce site or business site you can create it using WordPress.
WordPress site ranks High: Around 33% of the websites get created using WordPress CMS platforms. Moreover, Google gives high-rank credibility to WordPress sites. So, if you are using any other CMS platforms it might not be ranking as high as WordPress websites. It supports tools and extensions which helps your website rank high in Google.
Multilingual: WordPress provides 50+ language support which you can use and change the language in Hebrew, Chinese, and many more.
Themes and Plugins options: Since you have chosen WordPress as your blogging platform, you have a huge collection of free WordPress themes and plugins in its repository. You can find it on WordPress’s official site.
Built-in blog, comments, and responsiveness: WordPress is a CMS, which means you can manage, design, and publish your own content using blogs and comments. Furthermore, many of WordPress themes are very much mobile-friendly.
WordPress offers you many features and functionalities-based themes and plugins that you can choose from. You can create any type of website as per your niche. It can be e-commerce, business, job portal, and the list goes on.
Difference between .com and .org
I guess you have decided that you are using the WordPress platform, and if not let me know your comments as to which platform you have preferred and why?
You have to be careful here as there are 2 sides or I say 2 platforms of WordPress which are wordpress.com (paid) & wordpress.org (free).
WORDPRESS.COM
- WordPress.com is a hosted service where you can set up a theme and run your website.
- It is already set up for you and you need to sign up so that you can create your blog or website.
- It does not provide access to any files, custom themes, or plugin uploads.
- You need to have a Business Plan to upload a custom theme which is costly.
- They can delete your website if you violate their terms and conditions.
WORDPRESS.ORG
- WordPress.org is open-source and free to download.
- You can add your own custom themes and plugins as per the appearance and functionality that you need.
- A separate web hosting is required to host your website I recommend Bluehost.
- You can have your own custom domain URL as per your needs as no subdomain will be added.
- You are provided with server access where you are responsible for files and backups of your site.
- Full Flexibility for customizing your site.
These are some major differences but there are other differences too the choice is yours if you need to take full advantage and flexibility in creating your website you should go for the WordPress free CSM platform.
Additionally, with a self-hosted platform like WordPress, you can host your own website with better affordable plans and better service providers like Bluehost. You can easily set up and create your dream website in minutes.
Setting up WordPress
Since you know about WordPress, now it is time to set it up. But wait where are you going to set up your WordPress since you don’t have a domain name or hosting. Are you getting tense here? No worries.
In this section, I will provide detailed info to choose the right domain name and one of the best hosting services that you need for your website.
I have been recommending choosing one of the leading WordPress hosting companies like Bluehost. They have one of the best services and plans that you choose for your website.
A domain name is important this will provide your site address where your users search on google. I have divided this topic into different parts to get a better idea of how and what type of domain name you can choose.
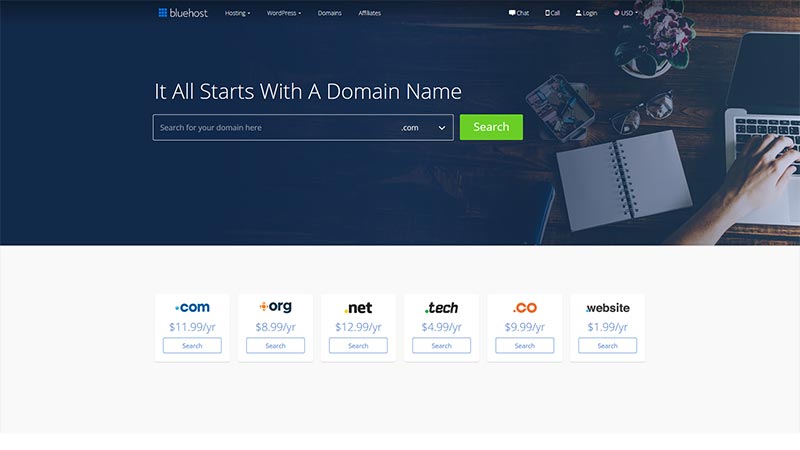
Getting a domain name
Some of the hosting providers provide the facility to choose your own domain name. There are other domain service providers that provide you better domain names at an affordable price. I have been telling you about Bluehost for a while now and I will tell you why I recommend and urging you to go for Bluehost.
I would mind you that both domain name registration and domain hosting are different aspects, though they are different sides of the same coin, some of the better hosting providers provide both domain and hosting at an affordable price.
There are many domain extensions that you can choose from like .com, .org,.net,.info and etc. You can choose any of the extensions that you like according to your site.
Type of name and domain should you choose
This is something important that you should focus on purchasing a domain name. Your website should define what type of name you should register so that users don’t forget and easily type in the name in google and visit your site.
It should not be misleading if you have created a website on real estate and your domain name is different then it is possible that users will get misled by the content that you show on your site (redirecting to porn, happens to me many times) 😉
Put yourself in the reader’s shoes that what they need and what type of website they need. If your website name is too long how are they going to remember it and how they will be recommending your site to other friends and users.
So, it’s important not to have any domain name not too long or not too short.
Now, here is my favorite part as you might be getting so hyped up why I have been mentioning Bluehost as your hosting provider for ages.
Before I tell you about Bluehost, I will like to tell you about “Web Hosting” you need to know what is web hosting?
Perhaps you might know what it is but an overview of this one would give a better idea for beginners. “Web Hosting is a type of service which is provided to secure your files, and folders and make the site accessible to people when they type in your domain name in the URL.”
If you are looking for alternatives then here are some of the other hosting service providers like Hostgator, Siteground,iPage, GoDaddy, and many more but this is up to you which service you prefer for hosting your website.
Choosing the right plan & service for hosting you need
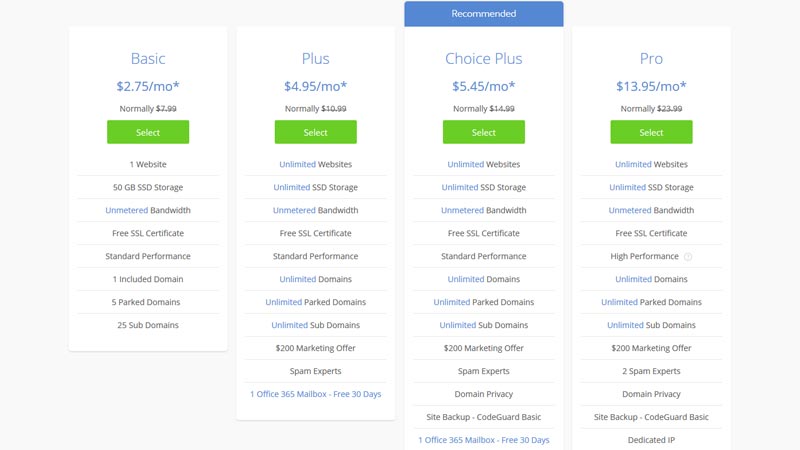
It is important to note, what type of services and plan you need before purchasing the web hosting service plan. Even if you have a small website you don’t need to purchase or spend a huge amount of services and plan for hosting your website.
There are many services that a web hosting service provides but before purchasing your plan it should be noted what type of services they provide and what type of service you need.
The most important thing before purchasing a web hosting plan as it would be easy to use, simple, secure, provides support, and low cost.
Bluehost provides all these features and awesome services that I need and moreover you can get multiple options and services that you might like Shared Hosting, WordPress Hosting, VPS, and Dedicated hosting service.
Bluehost is one of the leading web hosting services which is also recommended by WordPress if you are starting to create a website. It is affordable, and secure, and provides support 24/7. Moreover, it provides you with assurance and guidance on each and every step for maintaining your site’s security and better performance.
I hope I have convinced you why I have been referring to Bluehost as one of your website hosting partners. It would be a shame that after a long time of hard work, pain, and energy; you have created your dream website, therefore you need some assurance and guarantee that it cannot get into the wrong hands like affecting it by malware or get hacked.
Installing WordPress
You have a registered domain name and web hosting so, installing WordPress would be a cakewalk for you. If you have chosen Bluehost as your hosting partner then after logging into the Bluehost account you will find the cPanel option where you can install WordPress.
Your hosting service will provide you the login details with your username and password to login to your Bluehost login panel.
(Note: Below screenshot is of Bluehost cPanel Dashboard, but it will differ according to the hosting that you have purchased)
That’s right most of the CMS web hosting platform has a one-click WordPress install option on the cPanel option where you can find your domain name & login details. Finally, you can click on the WordPress install and it will be installed on your registered domain name.
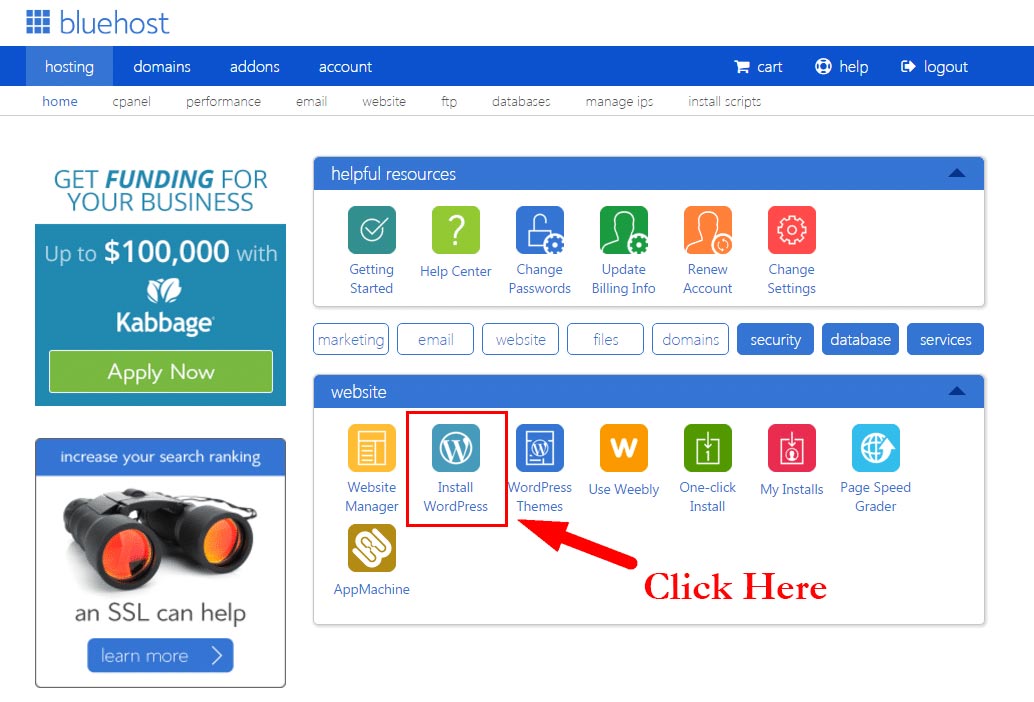
Installing the WordPress from the web hosting panel is easy and with the easy-to-use interface hosting service provided by Bluehost, you can install WordPress in seconds probably in less than 45 seconds 😉
Installing WordPress Manually (for localhost)
You can also install WordPress manually through an FTP server. FTP can be generated from the hosting panel which provides you with a hostname, username, and password to connect through your FTP server using FileZilla.
If you are more familiar with FTP (File Transfer Protocol) then you can use Filezilla where you can manage your file upload and download them accordingly.
With that said, you can access your server and install WordPress by downloading from wordpress.org, not wordpress.com because it’s a self-hosted site.
Once you download the zip file you need to unzip it and upload the files through FTP manually. Once you upload the files you need to create your database where all your website data will be stored on your server.
Creating Database Manually
You can access your cPanel, and locate the MySQL Database option where you can create your database. After that, you need to create the username to which you need to assign privileges, and the user will be able to change the data in the created database.
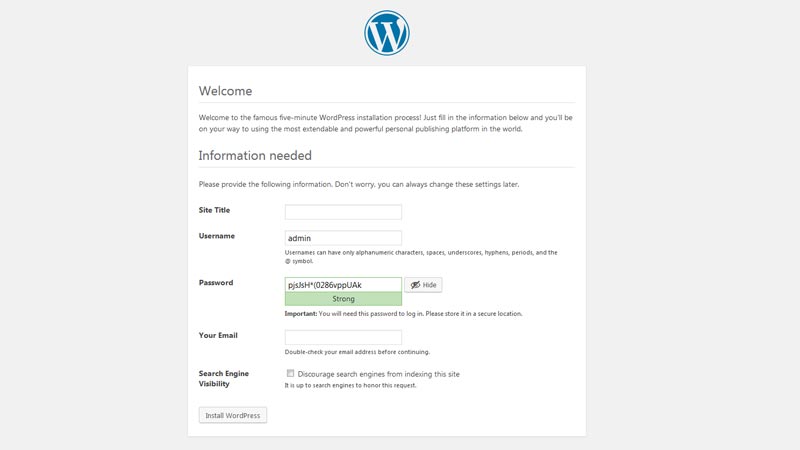
Finally, after you type in the domain name you will be greeted with the WordPress install option where you need to add the following options which you have created and added to your cPanel.The database name that you have created through cPanel should be the same in the wp-config.php file
- Database name
- Username
- Password
- Database host
- Table Prefix
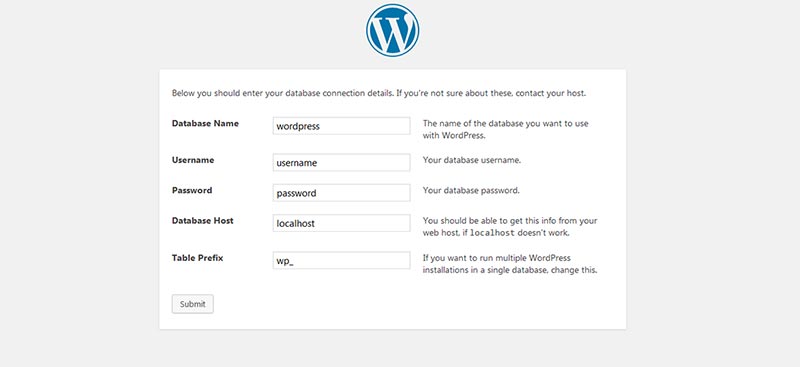
Now, click on the submit button then you are all way through to installing the WordPress manually on your site. After that, it will ask with the username and password where you can add it and your WordPress installation gets completed.
This manual part of installing WordPress might not be familiar but I would prefer it if you let your web hosting service do the work for you with the one-click WordPress install feature. As doing the manual installation it might be possible that the installation could run into mishaps.
Since we have installed WordPress both through hosting (automatically) and by FTP (manually) we are ready to set up your own blogging site and ready to explore the backend Admin Panel 🙂
Choosing the THEME
Since you have halfway down the road and you have learned how to install WordPress on your site. Now it’s time to choose the theme. By default, you will be provided with the default WordPress theme which you can use for your blogging site.
For those who have not decided what to blog or which theme you should choose don’t worry you can check out this list here Best ThemeForest WordPress themes that you can use to create a WordPress site.
There are 1000s of themes that are available in the wordpress.org theme gallery and if you like to spend some investment then there are 100s of WordPress theme providers where you can purchase a premium theme for your site.
More importantly, keep the theme simple and have minimal features for blogging. Choosing the right theme should be the base of your website as it plays a vital role in SEO.
The theme that you might choose should be clean and well-responsive so that your readers get a better user-friendly and mobile-friendly experience. Google ignores website which is not user-friendly and less responsive but nowadays all themes are very much responsive.
Installing the theme
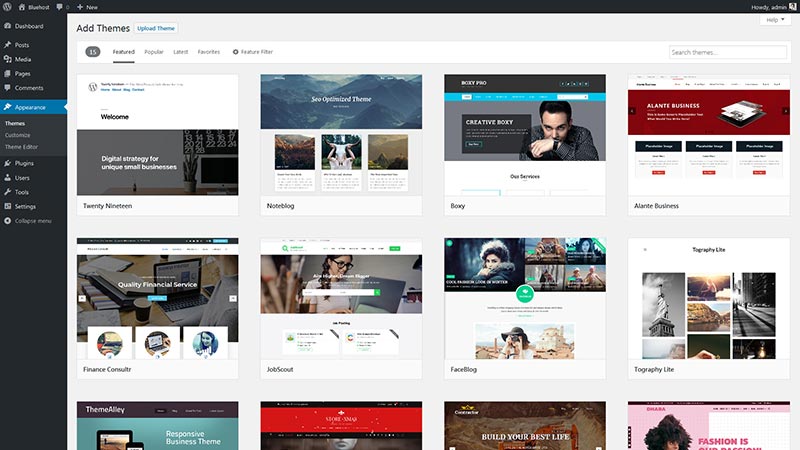
Choosing the theme is the most difficult part whereas installing is easy. You need to access your WordPress admin Dashboard panel and navigate to Appearance >> Theme section. Click on the Add New button. Here, you will see 1000s of FREE themes that are available in the wordpress.org theme gallery.
You can go for a Premium theme or you can choose FREE themes available on wordpress.org once you have decided which theme you need you can install the theme on your site.
If you are seeking a paid premium theme then you can download the theme from where you have purchased and you will receive it in a .zip format.
Please don’t unzip it as you need to access your WordPress admin Dashboard >> Appearance >> Theme section. Click on the Add New button and upload the zip. Once you upload the zip file you need to activate the theme and your site will be ready.
Installing theme manually
There’s another way where you can install the theme through FTP (File Transfer Protocol). Remember how we installed WordPress through FTP the same way we can install the theme using FTP.
Once you log in to your FTP server you need to access the following path wp-content/themes section this is where you can unzip the theme which you have purchased or downloaded and upload it on this path. It is also one way where you can keep your individual file backups and make changes to your PHP files.
There are a lot of PAID and FREE themes available but it is up to you which theme you need for your site moreover, once you choose the theme it is going to be difficult to change it after you are halfway down building your website.
Check on this list here Top Premium WordPress theme Providers for 2023
Adding Content and Pages
Now, it’s time to add some content to your site. You won’t be showing your site empty right as you need something on your website. By default, WordPress provides the functionality to add posts and pages.
These are the 2 Key pillars on which your whole blogging site is dependent.
First of all, you need to understand the major difference between posts and pages. When I first started using WordPress I was adding all the content on pages. After that, I realized how will I be showing this on my site.
The craziest thing to do was create menus and submenus which were all congested and buggy to use. Then I realized there is one more section that I can use for adding my Blogs and content and it was easy to use and manage on my site.
What are the pages?
Let’s take an example when you install WordPress and visit your site’s front end it will show the page and it will show very little content with some extra info on the main content.
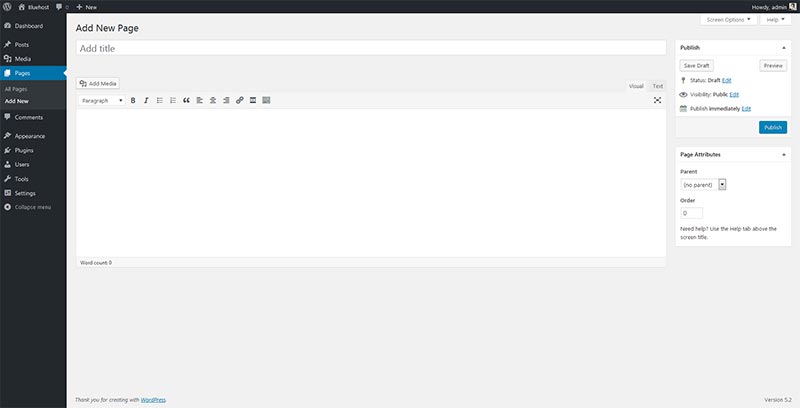
When users visit your site by typing in the URL they will greet with your main Static Page, which Homepage. Creating a page is easy, you can access your Admin Dashboard >> Pages >> Add New and add a title and description to show. Once you add the title you click on publish on the right-hand side and your page gets saved.
There would be many options that you would see on the right-hand side of the section like Publish Date which shows the creation of the page, status, and so on. Below you will Page Attributes where you can see what type of Template you need to choose.
If you are a techie and not satisfied with the default layout of your page you can Page Builder plugin. It will help you in designing your own page for your site.
There are some FREE and Premium plugins that you can use for designing your page.
Some of the plugins which are popular are:
- WP Bakery– WP Bakery is one of the popular Page Builder plugins which you can use for creating any type of page template and customizing your site as per your needs. This Drag & Drop page builder helps you to create different layouts and design elements. All elements are free to use and mobile-friendly. The plugin can be used on any third-party WordPress theme and you can even experience the Live Preview of changes that you make on the front end.
- Elementor – This is one of the leading WordPress Page Builders that you can use easily and does not require any coding skills. Elementor is free to download and you can unlock advanced features by upgrading to the premium version of the plugin. It is very flexible and all the elements that you see in the plugin are very much responsive and mobile-friendly. You can use this plugin on any WordPress theme.
- Page Builder by Site Origin – Site Origin is a Free Responsive Page Builder which you can use to create any type of page template and customize your WordPress site. You can simply drag & drop the interface on the widget, pages, or post without needing any coding skills. It is lightweight and SEO-friendly. You can use it on any WordPress site and enhance the Live editing experience without access to the backend of your WordPress site.
What is Post?
As you are a blogger you will be dealing more with Post. There isn’t much to discuss on the post as you can click on Post >> Add New and add title and description and select the categories and hit publish.
On the right-hand side, you will see some options to create categories when you add a new post or you can create them on the Post >> Category section.
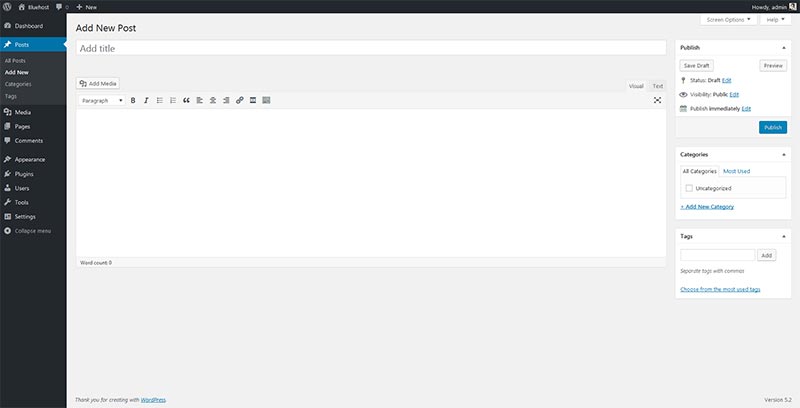
You will see a tag option where you can do the same process but it would be great to add tags when you create a post as you won’t know which tags you need and create for the blog post that you are creating.
In the post section, you will see many options you can customize the slug and see the author of that post who has created it, and published date, and many more.
If WordPress doesn’t show this info by default you can see them on the top right corner SCREEN OPTIONS where you can click it and you can check which options you need to show on the WordPress post editor.
You can add an image to the post that you have created on the backend so whenever you create a post you can add images for each blog post that you can show it to your readers.
There will also be a field named excerpt which means you can add a little bit of glimpse explanation to the post that you have created and that will be shown on the category page of your blog page with a READ MORE link where clicking on that link will redirect to the detail page of that blog.
Check on this link here to know the difference between a post and an excerpt.
What are categories and tags and why do I need one?
That’s a pretty normal question since you have noticed that there is no section for adding categories and tags for pages then why should you add categories and tags for a post.
Since you might be writing many posts for your readers then there should be a category where you can categorize your post to filter what type of post is relevant and resemble the topic that they are searching to read.
Let’s take an example, where you are writing about Fashion then in that you would be writing about Men’s wear, Kid’s, Shopping, and many topics related to Fashion so your readers when they click on the Men’s Wear category they will be seeing all the men’s wear-related post.
The same goes for Tags. It gets used for the vast majority of searches where they can see the relevant post the same as categories. Since you know the use of Categories and Tags we can move forward to the next topic where you can see your images.
Media and Media Library
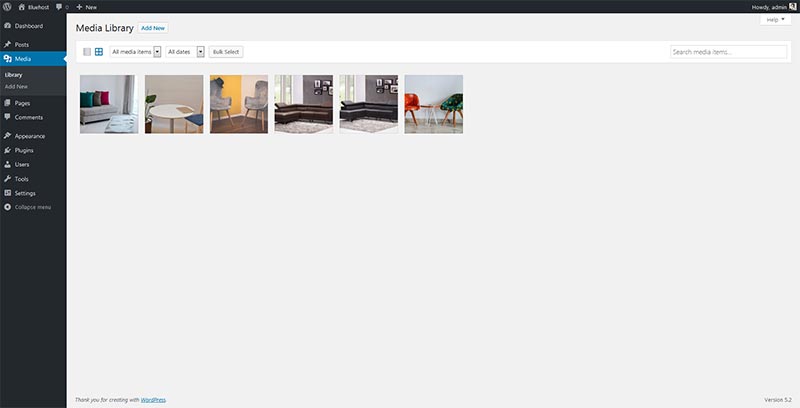
Don’t get confused they are both the same 🙂 Since you know how to add pages and post, creating categories and tags you need to know what is media and what this media library usually contains in it? When you add images to the post your images get stored in this Media library section.
Media can be anything as it can be Images, Graphics, Videos, or Audio whichever WordPress supports as its functionality. All these images get shown on the Media Library and you can also add them from the Media section where you can click on Add New Media and add images.
A backup of these images will be available on your server which you can find in the wp-content/uploads folder. You need to access your server using FTP or from your Bluehost panel and see the images that you have uploaded to your site.
Getting Familiar with Comments
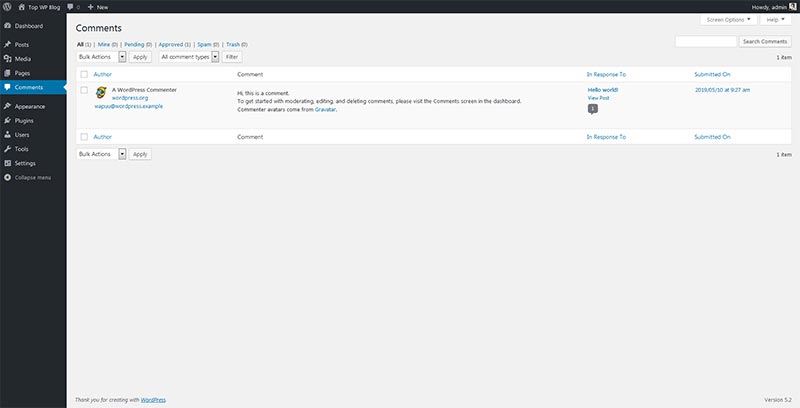
Since your post is live and your readers will be viewing your post there are some suggestions, Feedback, and reviews received from them. Having a comments section is a great way of getting a touch and interacting with the users who are reading your post.
Since there would be a lot of readers reading your post there could be some positive and negative reviews on your post. Now, you might be thinking that how can I avoid negative reviews as they will hurt my Goodwill.
Usually, comments get shown on the detail page of your post section. You will see fields to add description, name, email, and website (optional). You can see all of your post comments on the backend of your Dashboard >> Comments section. Here you will see who has posted and what type of comments has been posted to the relevant post on your site.
You can restrict or put on hold the immediate comments that you receive on your post which you can find on the backend Settings >> Discussion section.
In this section, you can manage to restrict the comments and even you can put them on hold for immediate comments where you can manually approve them from the backend.
We are almost halfway down the road and I guess you are pretty confident about knowing and using WordPress settings on your own.
Remember, WordPress is easy and it is fun you can create as many WordPress websites as you want. This is the right platform where you can start blogging and start making money through blogging.
Let’s check on some of the other sections of WordPress, shall we 🙂
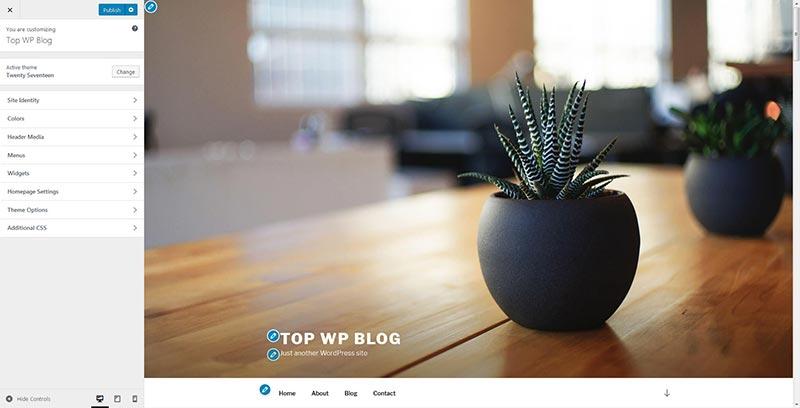
Customizing your theme
Playing with widgets and menus
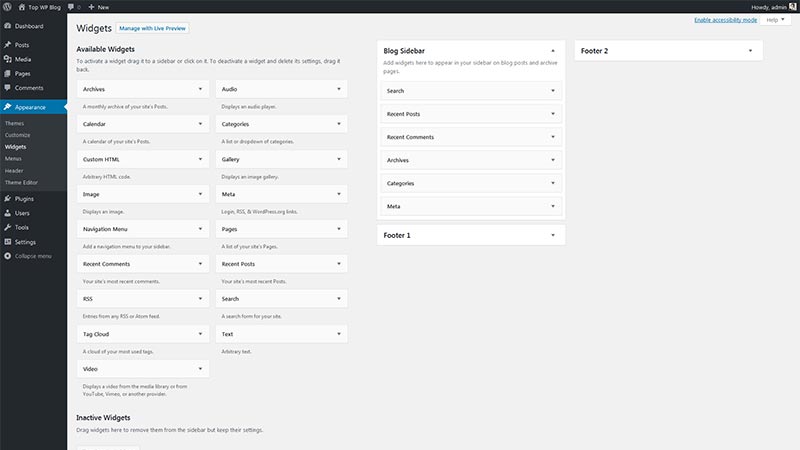
Playing with widgets is easy you might be having a smartphone where there are options to use widgets. In the same way, we have certain widget areas and widgets where you can add widgets on the homepage or any other page of your site.
Again, the widgets and widget area would expand according to the theme and plugins that you use. If you are going for a paid theme then more customization options and widgets are found. You can the widgets on your Homepage Main content and sidebar area of different pages.
Creating your menus is damn easy since some of the paid themes provide options to add menus on the header area, on the secondary area just above the main content, and also on the footer area.
You can find these options on the Appearance >> Menu section and the cool feature is that you can show different menus in different areas and create as many menus to be shown on the site.
You can create menus to show on any page sidebar as WordPress provides a widget which is Navigational Menu that you can use on any page sidebar.
Adding new features with add-ons
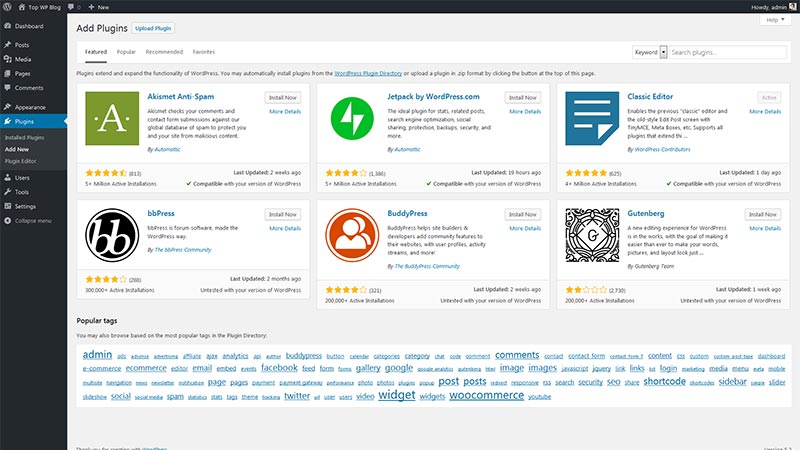
In WordPress.org there are many FREE plugins that help you in extending the functionality of the website.
As an admin of the site, you can install/uninstall the plugin from the backend of the Plugins section or you can connect to your FTP server and add the plugins after downloading the same from the third-party site.
Remember, you need to extract the file on your local PC and then you need to upload the plugin through the FTP server.
When it comes to FREE plugins you need to make sure which plugins you need as there are plugins that do not support the theme that you use and moreover you might be not getting enough support from the plugin developers.
Choose the right plugin
- Before installing these plugins you have to ask yourself basic questions like how long the plugin has gets updated?
- Does the plugin have incompatible issues with WordPress’s latest version and my theme?
- Is there any support available?
- Does the plugin popular and has great demand?
I have mentioned 25+ best and most popular WordPress plugins that you need for your WordPress site. These plugins are popular and used based on functionality. Also on the usage as what type of features provide and contribute to your WordPress site.
Getting deep with Users.
Since you have learned all the important topics and sections of WordPress let’s look at some of the other settings. A user management section that would help you in managing the users who have registered on your site. Also, how you can manage your WordPress settings?
Users: All the users who are registered on your site will be seen here. As an admin of the site, you can manage users from this section. You can edit the user’s personal info or you can delete any user as an admin of the site. Furthermore, you can also add new users and assign them a relevant roles.
Always, make sure that you give a role as a “Subscriber” so that they have limited access to your site. If they would be assigned as an ADMIN then they would have full access rights to make the changes on your site. You can check the full details of the roles and capabilities that the user provides for WordPress.
Other Settings on WordPress.
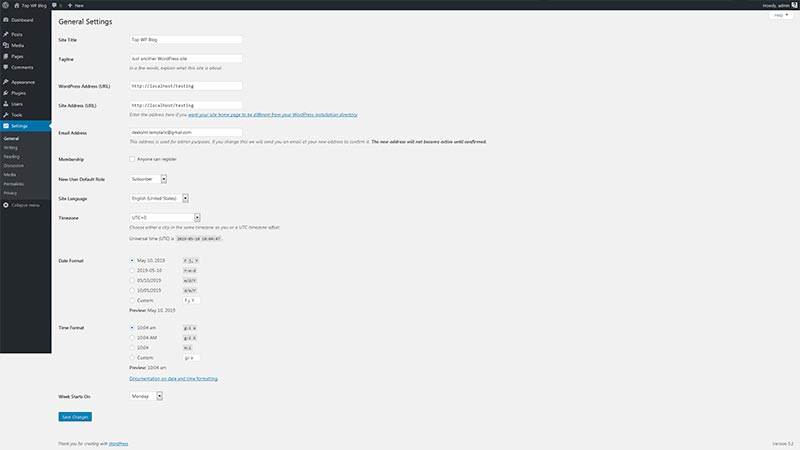
- General Settings: This section generally covers the basic settings that you need for your site as you will see the Site Title and Tagline which we have already covered in the Appearance >> Customize section. You will see the field for WordPress address and Site Address URL. This is the URL that would determine the domain of your main homepage.
- Email Address: You can add your email address here this is also shown when you install WordPress for the first time. This will determine that whenever any notification comes from the site you will receive the email. It can either be a contact form or comments or a new user registration. You can also change your email address if you wish to add another email address for business purposes.
- Site Language: As I have been telling you that WordPress comes in 50+ languages so you can choose your own language and make the site your local language site.
- Membership and Role: You can decide whether you need to have users register on your site or not. With the ANYONE CAN REGISTER option users will be able to register on your site. Disabling it new users won’t be able to register to your site. Once they get registered users you can assign roles as per your needs. By default, the user role option selects as a subscriber from the backend.
Miscellaneous Settings
- Time Zone: You can manage the Time Zone and also the date/time format which you need to show on your site. By changing the date/time you will see the format changed on your website.
- Reading: Once you install your WordPress you will be willing to show or set the homepage as per your needs. You can choose the Static page if you have created a page called Home on the backend Pages section. With that done that page will be static and will not change when someone visits your site. You can choose the Latest Post option to show the latest blog post on the homepage. You will see an option for Blog posts at most, to increase posts on pages on your site.
- Discussion: In this section, you will deal with the comments management that you receive on each of the posts on your site. If a user needs to register on your site to comment or needs to approve instantly on your site.
- Permalinks: When you click on any post you will see a long URL which would be your domain name and the name of the post. With this permalinks option, you can manage the URL of your WordPress site.
Conclusion
If you are new to WordPress then this is the right post where you can understand the basics of WordPress. This WordPress for Beginners covers all the basics as to how you can use it to create a website.
In all, is one of the best CMS platforms that you can use to create any type of blog or website.
Apart from that, WordPress is easy to use and does not need high coding skills to create a website. Once you master WordPress you can know what type of WordPress theme or plugin you need to create a website.
I hope you know the basics of WordPress and if you wish to know more about WordPress please get in touch on Facebook and Twitter.
If you are new to WordPress and looking to learn WordPress then this post is right for you.