Update your PHP version of your WordPress website by following these easy steps.
Updating the PHP version for your WordPress site is a crucial task to ensure that your site runs smoothly and securely. PHP is the scripting language that powers WordPress, and using the latest version can improve performance, security, and compatibility with the latest features. In this comprehensive guide, we’ll walk through the steps to update the PHP version of your WordPress site.
What is PHP in WordPress?
PHP (Hypertext Preprocessor) is a widely used open-source scripting language that is particularly well-suited for web development. In the context of WordPress, PHP plays a crucial role as the core programming language that powers the platform. In this detailed exploration, we will delve into the significance of PHP in WordPress, its role in the architecture, its features, and how it contributes to the dynamic and flexible nature of this popular content management system (CMS).
1. Introduction to PHP:
PHP is a server-side scripting language designed for web development, but it can also be used as a general-purpose programming language. Furthermore, it is embedded in HTML code and interpreted by a web server with a PHP processor module, resulting in dynamic web pages. In addition, PHP code is executed on the server, and the output is sent to the client’s web browser, which then renders the page.
2. PHP in WordPress Architecture:
WordPress is a PHP-based CMS that powers a significant portion of the internet. Besides, its architecture relies heavily on PHP for the following key components:
a. Core Functionality:
PHP is the backbone of WordPress. The core functionality of WordPress, including handling requests, processing data, and generating dynamic content, is executed through PHP scripts. Moreover, these scripts are responsible for managing posts, pages, themes, plugins, and user interactions.
b. Themes:
WordPress themes are composed of PHP files that control the presentation and layout of a website. PHP is used within these theme files to dynamically generate HTML, ensuring that the appearance of the site can be easily customized. Moreover, theme developers leverage PHP to create templates, loops, and conditionals, providing flexibility and control over the site’s design.
c. Plugins:
WordPress plugins extend the functionality of the platform. Plugin developers use PHP to create custom features and functionalities that seamlessly integrate with WordPress. In addition, plugins consist of PHP files that execute specific tasks, such as adding custom post types, implementing new shortcodes, or enhancing security.
3. Features of PHP in WordPress:
a. Dynamic Content Generation:
PHP enables the dynamic generation of content in WordPress. This dynamic nature allows for the creation of templates and themes that adapt to various devices and screen sizes, providing a responsive user experience. PHP’s ability to interact with databases ensures that content, such as posts and pages, can be retrieved and displayed dynamically.
b. Customization:
PHP empowers WordPress users to customize their websites extensively. Through the use of PHP files, users can modify themes, create child themes, and develop custom templates. This customization extends to the creation of custom plugins, allowing users to tailor the functionality of their sites to meet specific requirements.
c. Interactivity:
PHP facilitates interactivity on WordPress websites. It allows for the creation of forms, interactive elements, and user authentication systems. This interactivity enhances user engagement and contributes to the overall user experience.
d. Database Interaction:
WordPress relies on a database, typically MySQL, to store and retrieve data. PHP is responsible for interacting with the database, executing queries, and retrieving information dynamically. This interaction is fundamental to the functioning of WordPress as a dynamic content management system.
e. Server-Side Processing:
Being a server-side scripting language, PHP processes requests on the server before sending the output to the client. This server-side processing ensures efficient performance and enables the execution of complex tasks, making WordPress capable of handling a wide range of functionalities seamlessly.
4. Advantages of PHP in WordPress:
a. Community Support:
PHP has a vast and active community, and WordPress, being PHP-based, benefits from this support. The extensive community contributes to the development of plugins, themes, and solutions, making it easier for users to find resources and assistance.
b. Scalability:
PHP provides scalability to WordPress websites. As websites grow and require additional features, PHP’s modular and extensible nature allows developers to scale the site by adding custom functionality through plugins and themes.
c. Accessibility:
PHP is widely supported by hosting providers, making WordPress accessible to a broad audience. The compatibility of PHP with various operating systems and databases ensures that WordPress can be installed and run on diverse server environments.
5. Challenges and Considerations:
While PHP is a powerful language for web development, there are some considerations and challenges associated with its use in WordPress:
a. Security:
Security is a critical concern when working with PHP and WordPress. Poorly coded themes or plugins can introduce vulnerabilities. Regular updates, adherence to coding best practices, and the use of secure coding techniques are essential to mitigate security risks.
b. Performance Optimization:
Efficient PHP code contributes to faster website performance. Developers need to optimize their PHP code, minimize database queries, and employ caching mechanisms to ensure that WordPress websites load quickly and handle traffic effectively.
c. Learning Curve:
For beginners, the learning curve associated with PHP and WordPress development can be steep. However, numerous resources, tutorials, and documentation are available to assist developers in mastering these technologies.
Why Update PHP?
Before diving into the steps, it’s essential to understand why updating PHP is important:
- Security: Older PHP versions may have security vulnerabilities that can be exploited by malicious actors. Using the latest PHP version ensures that your site is protected against known security threats.
- Performance: Newer PHP versions often come with performance improvements, optimizing the execution of your WordPress site and reducing load times.
- Compatibility: As PHP evolves, new features and functions are introduced. Updating PHP ensures that your site is compatible with the latest technologies and can use new functionalities.
- WordPress Support: Running an outdated PHP version may lead to compatibility issues with the latest WordPress releases. Updating PHP ensures that your site remains compatible with the latest WordPress updates.
Steps to Update PHP in WordPress:
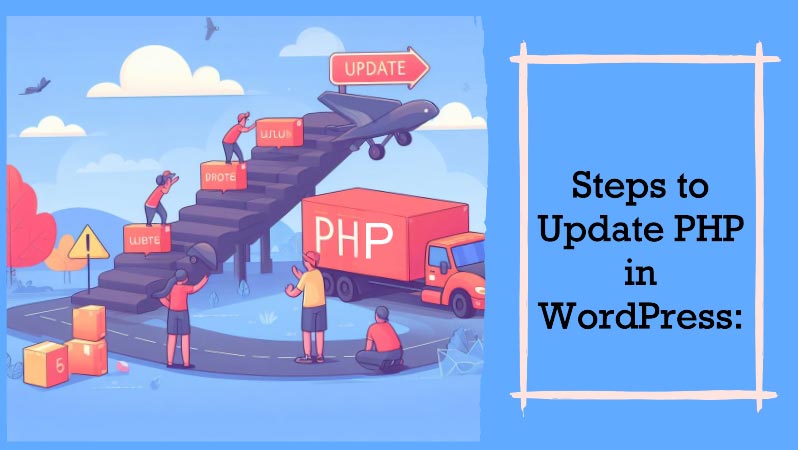
Step 1: Check WordPress and Theme Compatibility
Before updating PHP, ensure that your WordPress version and active theme are compatible with the PHP version you plan to upgrade to. Visit the official WordPress website and theme documentation to verify compatibility information.
Step 2: Backup Your Website
Always create a backup of your WordPress site before making any major changes, including updating PHP. This ensures that you can easily restore your site in case something goes wrong during the update process.
You can use plugins like UpdraftPlus or manually back up your files and database through your hosting provider’s control panel.
Step 3: Check Hosting Requirements
Verify that your hosting provider supports the PHP version you want to upgrade to. Some hosting providers may not offer the latest PHP versions, or they might require you to make the update through their control panel.
Step 4: Update WordPress Core and Plugins
Ensure that your WordPress core and plugins are up to date. This helps avoid compatibility issues that might arise with older versions of plugins or themes when using a newer PHP version.
Step 5: Update PHP Locally (Optional)
If possible, consider updating PHP locally first before making changes to your live site. This allows you to test for compatibility issues without affecting your live website.
Step 6: Access Your Hosting Control Panel
Log in to your hosting account and access the control panel. The control panel interface varies among hosting providers, but commonly used ones include cPanel, Plesk, and others.
Step 7: Locate PHP Configuration Settings
Find the section in your hosting control panel where you can manage PHP settings. This may be labeled as “PHP Settings,” “Select PHP Version,” or similar.
Step 8: Choose the Desired PHP Version
From the PHP settings section, select the desired PHP version from the available options. Choose a version that is both compatible with your WordPress installation and supported by your hosting provider.
Step 9: Configure PHP Extensions (if needed)
Some PHP versions may require specific extensions to be enabled or disabled. Review the extension settings and configure them according to your site’s requirements.
Step 10: Save Changes
Once you’ve selected the desired PHP version and configured any necessary settings, save the changes. This action might take a few minutes, and your site may experience a brief period of downtime during the update process.
Step 11: Test Your Website
After updating PHP, thoroughly test your website to ensure that everything is working as expected. Check various pages, functionalities, and plugins to identify any issues.
Step 12: Monitor Error Logs
Review your site’s error logs for any PHP-related errors. These logs can provide valuable information if there are compatibility issues or other problems after the update.
Step 13: Troubleshoot and Rollback if Necessary
If you encounter issues, troubleshoot by deactivating plugins, switching to a default WordPress theme, and checking for compatibility. If problems persist, consider rolling back to the previous PHP version and seek assistance from your hosting support or developer community.
Step 14: Update Content Delivery Network (CDN) Settings
If you use a CDN, ensure that it’s configured to work with the updated PHP version. Clear the CDN cache to reflect the changes made to your website.
Step 15: Update Security Measures
Review and update security measures on your site, including WordPress security plugins and settings. Updating PHP enhances security, but it’s essential to reinforce other security aspects as well.
Step 16: Inform Stakeholders
If you’re managing a website for a client or organization, inform stakeholders about the PHP update, potential downtime, and any actions they may need to take, such as clearing browser caches.
How to update the PHP version in the XAMPP Server?
Updating the PHP version in XAMPP involves replacing the existing PHP files with the files from a newer PHP version. Here’s a step-by-step guide:
- Download the Desired PHP Version:
- Visit the official PHP website: https://www.php.net/downloads.php.
- Download the Thread Safe (TS) version of PHP for Windows.
- Backup your current PHP configuration (optional):
- Before making any changes, it’s a good practice to back up your current PHP configuration. You can copy the
php.inifile and any other configuration files you’ve modified.
- Before making any changes, it’s a good practice to back up your current PHP configuration. You can copy the
- Stop the XAMPP Server:
- Open the XAMPP Control Panel.
- Stop Apache by clicking the “Stop” button.
- Navigate to the XAMPP PHP Directory:
- Go to your XAMPP installation directory.
- Locate the “php” folder.
- Rename the Existing PHP Folder (optional but recommended):
- Rename your existing “php” folder to something like “php_old” to keep it as a backup.
- Extract the Downloaded PHP Archive:
- Extract the contents of the downloaded PHP archive to the XAMPP installation directory. This will create a new “php” folder.
- Copy Configuration Files (if necessary):
- Copy your backed-up
php.iniand any other configuration files from the old PHP folder to the new one.
- Copy your backed-up
- Update Apache Configuration:
- Open the “httpd.conf” file located in the “apache/conf” folder of your XAMPP installation.
- Find and replace any occurrences of the old PHP version with the new one.
- Start the XAMPP Server:
- Open the XAMPP Control Panel.
- Start Apache by clicking the “Start” button.
- Verify PHP Version:
- Open a web browser and go to http://localhost/phpinfo.php.
- Create a new file named
phpinfo.phpin your web root directory (usually “htdocs”) and add the following code:
<?php
phpinfo();?> - Visit http://localhost/phpinfo.php in your browser and check the PHP version.
That’s it! You should now have the updated PHP version running on your XAMPP server. Keep in mind that updating PHP might affect compatibility with your existing projects, so it’s a good idea to test your applications thoroughly after the update.
How to update the PHP version in the WAMP server?
To update PHP in a WAMP server (Windows, Apache, MySQL, PHP), you can follow these general steps:
Backup your Data: Before making any changes, it’s always a good practice to back up your databases and any important files.
Download the Desired PHP Version: Visit the PHP downloads page and download the thread-safe version of PHP that matches your WAMP architecture (32-bit or 64-bit).
Extract the PHP Archive: Extract the downloaded PHP archive to a location on your computer.
Stop WAMP Services: Make sure to stop the WAMP server services before proceeding with the update. You can do this by right-clicking on the WAMP icon in the system tray and selecting “Stop All Services.”
Replace the Current PHP Version: Copy the contents of the extracted PHP folder and paste them into the PHP folder of your WAMP installation. This folder is typically located at C:\wamp\bin\php\.
Configure PHP: Open the php.ini file in the new PHP folder with a text editor. You may also copy php.ini-development or php.ini-production as php.ini if they are available. Make sure to update any custom configurations you had in your previous php.ini file.
Update Apache Configuration: Update the Apache configuration file to use the new PHP version. Locate the httpd.conf file in the C:\wamp\bin\apache\Apache[version]\conf directory and update the LoadModule line for PHP to point to the new PHP version. For example:
LoadModule php_module “c:/wamp/bin/php/php[version]/php[version].dll”
Restart WAMP Services: Restart the WAMP server by right-clicking on the WAMP icon in the system tray and selecting “Restart All Services.”
Verify the PHP Version: Open a web browser and go to http://localhost access the WAMP server homepage. Click on the “phpMyAdmin” link or create a simple PHP file with phpinfo() a function to verify that the new PHP version is now active.
That’s it! You should now have successfully updated PHP in your WAMP server. If you encounter any issues, double-check the configuration files for any errors and consult the PHP and WAMP documentation for further assistance.
How to check the PHP version in WordPress?
To check the PHP version used by your WordPress site, you can use one of the following methods:
WordPress Dashboard:
-
- Log in to your WordPress admin dashboard.
- In the admin menu, go to “Tools” and select “Site Health.”
- Look for the “Info” tab, and you should find the PHP version listed under the “Server” section.
Theme Functions:
- You can add a simple PHP function to your theme’s
functions.phpfile to display the PHP version. Here’s an example:
function display_php_version() { echo ‘Current PHP version: ‘ . phpversion(); }
add_action(‘wp_footer’, ‘display_php_version’); - Add this code to the
functions.phpfile of your active theme. - Visit any page of your site, and you should see the PHP version displayed at the bottom.
Using a Plugin:
- You can use a plugin to check the PHP version. One such plugin is “Display PHP Version,” which adds a widget to the WordPress dashboard displaying the PHP version.
- Install and activate the plugin, and you should be able to see the PHP version on your dashboard.
Check via the Hosting Control Panel:
- If you have access to your hosting control panel (e.g., cPanel, Plesk), you can find information about your PHP version there.
Check via FTP:
- If you have FTP access to your server, you can create a simple PHP file (e.g.,
phpinfo.php) with the following content:
<?php
phpinfo() ; - Upload this file to the root directory of your WordPress installation.
- Access the file through a web browser (e.g., http://yourdomain.com/phpinfo.php) to see detailed information about your PHP configuration, including the PHP version.
