Are you going to accept appointment bookings in WordPress? We’ll tell you how to add the booking functionality to your WordPress website via dedicated WordPress tools! These tools work for any service business based on hourly appointments.
This article includes:
- The main motives to stick to WordPress as one of the most popular website-building platforms;
- Highlights of a top appointment booking plugin for WordPress;
- A quick overview of the WordPress tools we choose for this tutorial;
- A step-by-step guide on how to integrate appointment booking functionality into the WordPress website.
Top 5 Reasons To Choose WordPress
First, let’s point out that there are WordPress.com and WordPress.org platforms. In this tutorial, we’re talking about the latter because:
- If you are new to WordPress then you should know that it is an open-source platform you can use for free.
- The security it provides is of a top level.
- Plugins and themes offered by WordPress cover different business niches and site needs.
- The community of WordPress users and developers is huge. So, they may help you solve some issues or share their experience.
- Many hosting companies like Bluehost include WordPress in their hosting plans.
How To Find The Best WordPress Appointment Plugin?
We’d like to list some of the main features that any good WordPress plugin for accepting online appointments should have:
- A responsive appointment booking form;
- Online payment gateways;
- Support for multiple services/appointments;
- Booking management options;
- Integration with popular calendars;
- Automated notifications.
Tools We Use To Accept Appointment Bookings in WordPress
For this guide, we’ve chosen the WordPress Appointment Booking plugin by MotoPress. It comes packed with such features as:
- Support for unlimited services and employees;
- Online and offline payment methods;
- Flexible schedules for staff members;
- A centralized admin calendar to view bookings;
- Multiple services at one go;
- Scheduling for individuals and groups;
- Appointment Manager and Appointment Employee user roles;
- Booking synchronization with an employee’s Google Calendar;
- Different types of notifications,
- and more features.
We’ll use Edme to show you some examples coming through the main setup steps. Edme is an education WordPress theme that has the MotoPress Appointment Booking plugin integrated for free. So, it combines a well-made design dedicated to educational services and appointment booking functionality.
Let’s get started!
How To Add Appointment Booking Functionality To The WordPress Website?
Step 1: Install and Activate
You are free to choose between two options:
- Install and activate the Appointment plugin for WordPress and work out your WP theme’s appearance to fit the plugin’s functionality.
- Or else, you can install and activate one of the appointment booking themes that come bundled with the appointment plugin. They have both dedicated ready design and booking software. When the theme is activated, there are some plugins to be activated as well.
By the way, it takes a few clicks to import the theme demo data if you jumpstart a new website. In this case, the recommended settings will be set.
After the MotoPress Appointment Booking plugin is activated, the tab ‘Appointments’ should be displayed on the dashboard.
Step 2: Add Services
Next, you should add details about the provided services. Go to Appointments > Services and define:
- title & description;
- custom service duration;
- prices;
- buffer time between appointments;
- time before booking;
- min & max service capacity.
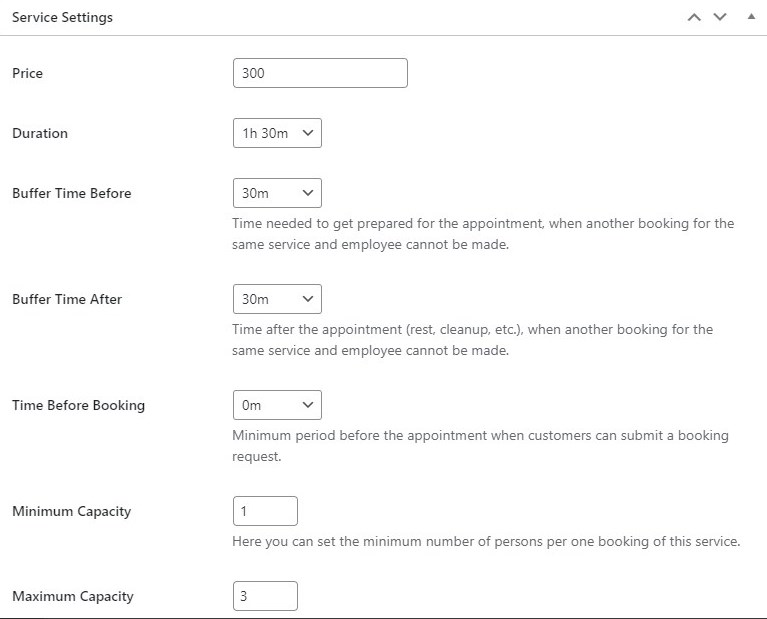
Also, this WordPress scheduling plugin allows you to:
- assign services to employees;
- set up a deposit (fixed/percentage);
- add notification notices.
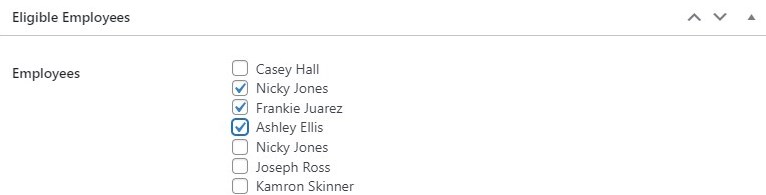
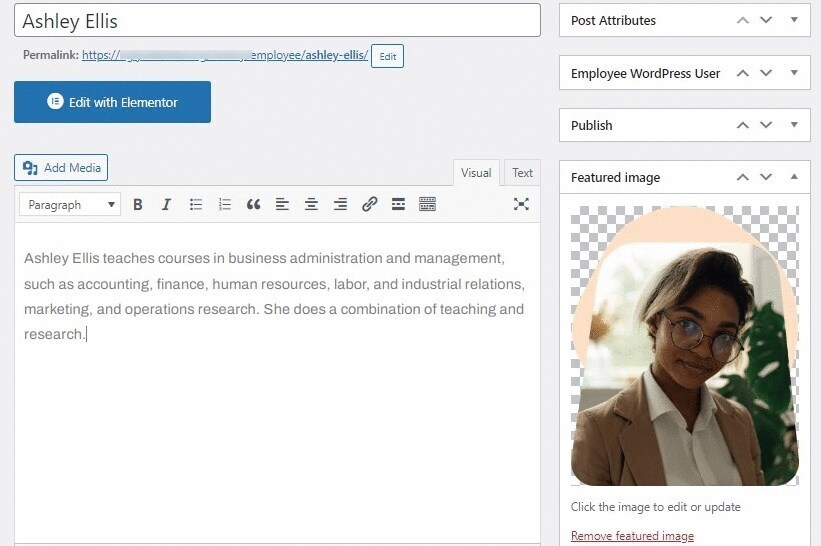
Step 3: Add Employees
In the ‘Employees’ subtab, you can fill in dedicated fields to create personal profiles for employees:
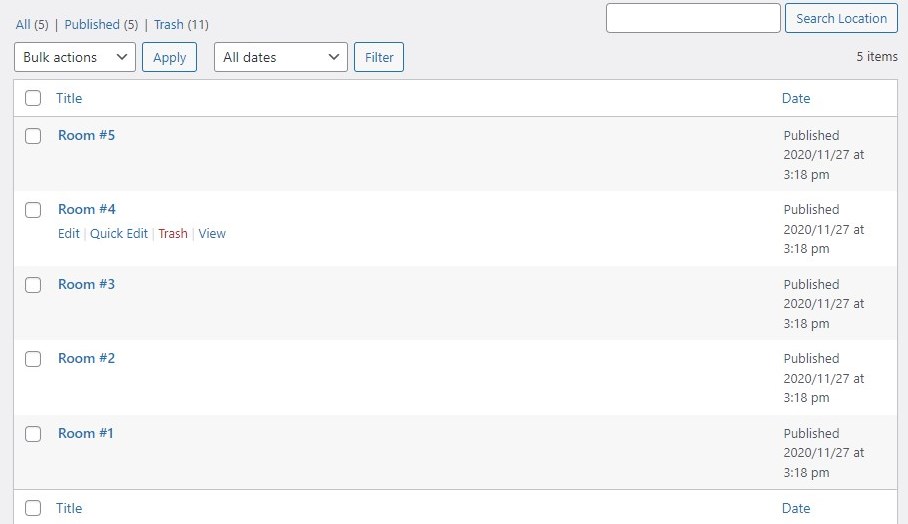
Step 4: Add Locations
You can do it via Appointments > Locations. It’s possible to subdivide locations into subcategories.
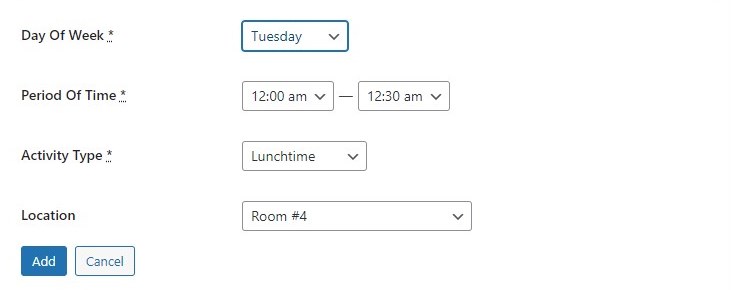
Step 5: Set Up Schedules
It’s time to add working timetables for each employee:
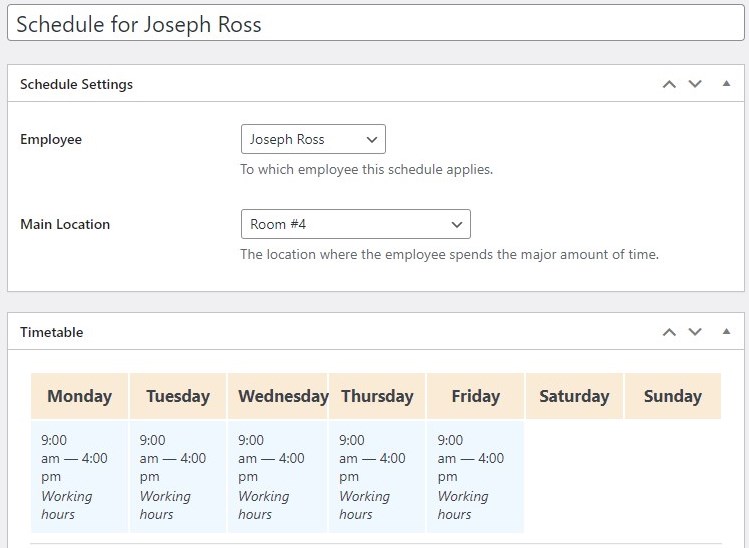
You can add days off, holidays, lockout hours, etc. there.
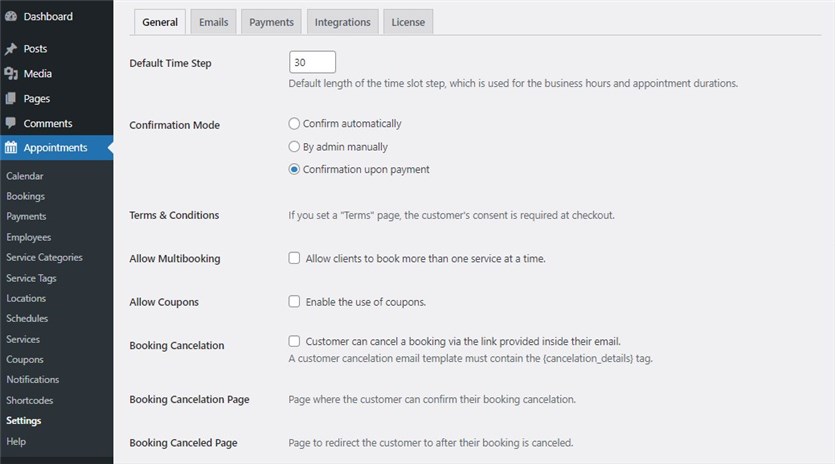
Step 6: Configure General Settings
Go to Appointments > Settings > General. This subtab lets you:
- specify the default time step;
- select a confirmation mode;
- allow multi-booking;
- enable coupons;
- set up booking cancelation;
- choose the country;
- configure currency options.
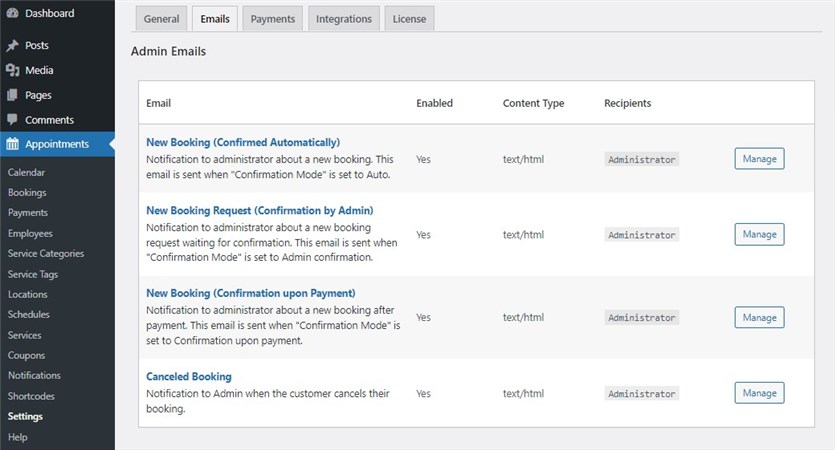
Step 7: Customize Email Templates
In the ‘Emails’ subtab, you can:
- Manage admin emails;
- Set up emails sent to customers;
- Configure the Email Sender and Email Template;
- Choose the preferred style for emails.
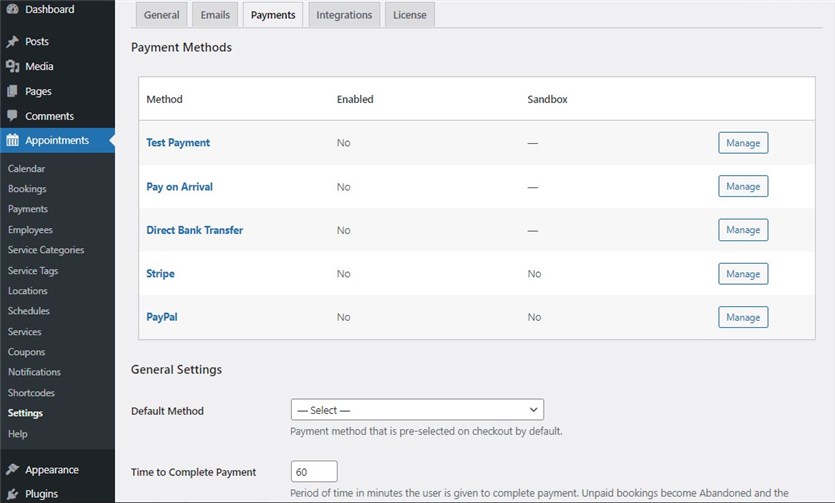
Step 8: Enable Online Payments
The MotoPress Appointment Booking plugin supports payments via PayPal, Stripe, a direct bank transfer, and payments after arrival. You can manage these methods in the ‘Payments’ subtab.
Step 9: Add Coupon Codes
If you enable coupons in the general settings, you will be able to add new coupons via the dedicated subtab and offer discounts for your customers.

Step 10: Add Appointment Booking Functionality To Your Website
Finally, you are at the stage of enhancing your website with the appointment booking functionality.
Shortcodes for an appointment form, employees list, locations list, services list, and service categories are available. You can copy and paste them into the corresponding page/section.
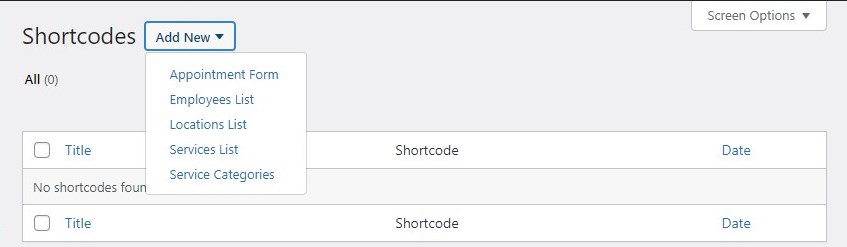
Otherwise, you can add these elements visually with Gutenberg, Divi, or Elementor page builders.
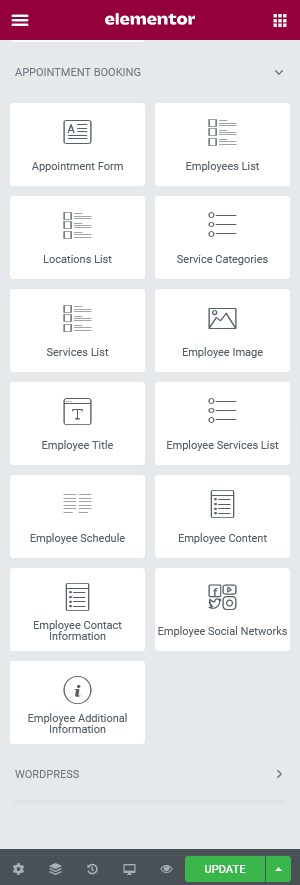
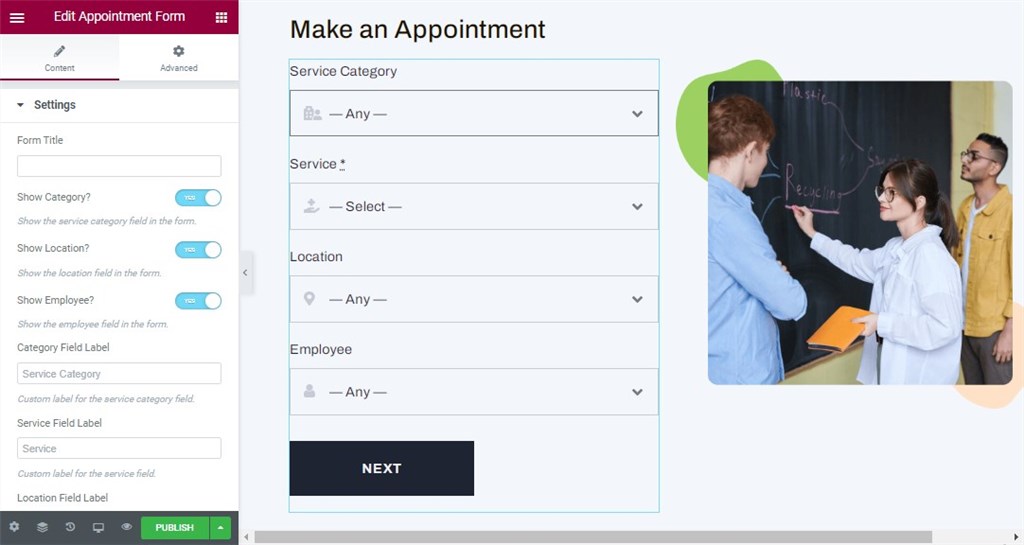
Here is how an appointment booking form widget by Elementor might look:
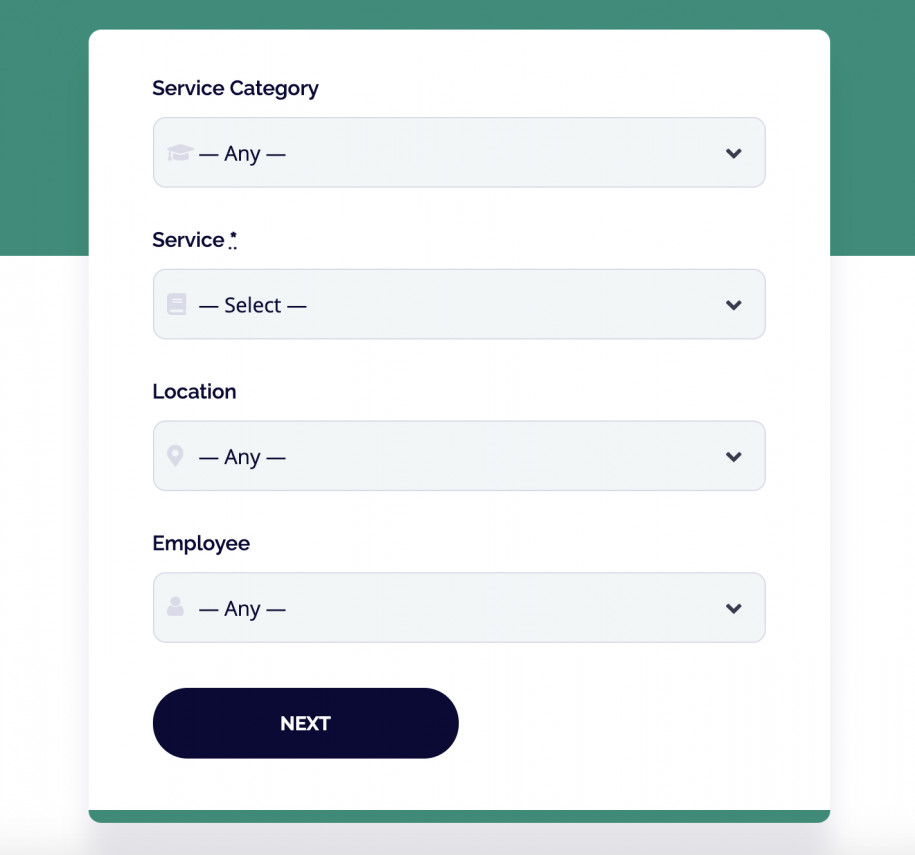
And a booking widget from the client’s side:
Step 11: Manage Bookings
The WordPress Appointment Booking plugin by MotoPress enables you to view bookings on the backend in a centralized calendar. Also, you can view different details, manually edit customers’ personal info, and change a booking status in the dashboard.
Conclusion
So, this was our guide on how to create a WordPress website for accepting appointments with one of the best appointment booking plugins. You may visit the plugin’s demo page to test drive its functionality at no cost. Hopefully, this article comes in handy for you and your business website! demo
Now, over to you,
Which plugin are you going to use to accept appointment bookings on your WordPress website?
What are the best WordPress themes in your niche?
Please let us know your thoughts in the comments and we would appreciate it if you can share this guide on Facebook and Twitter.